
-
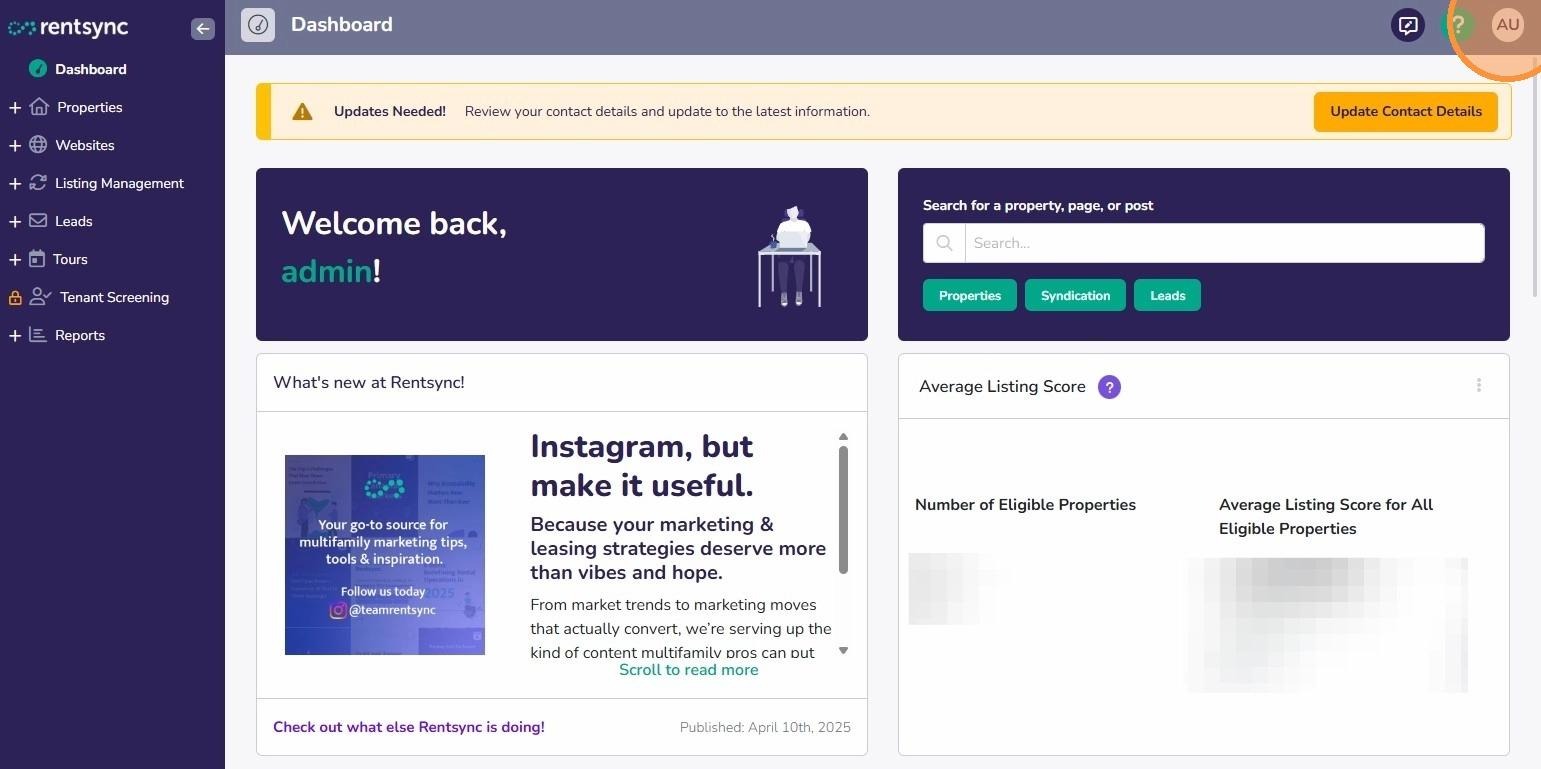
Click your initials in the top right corner
-
-
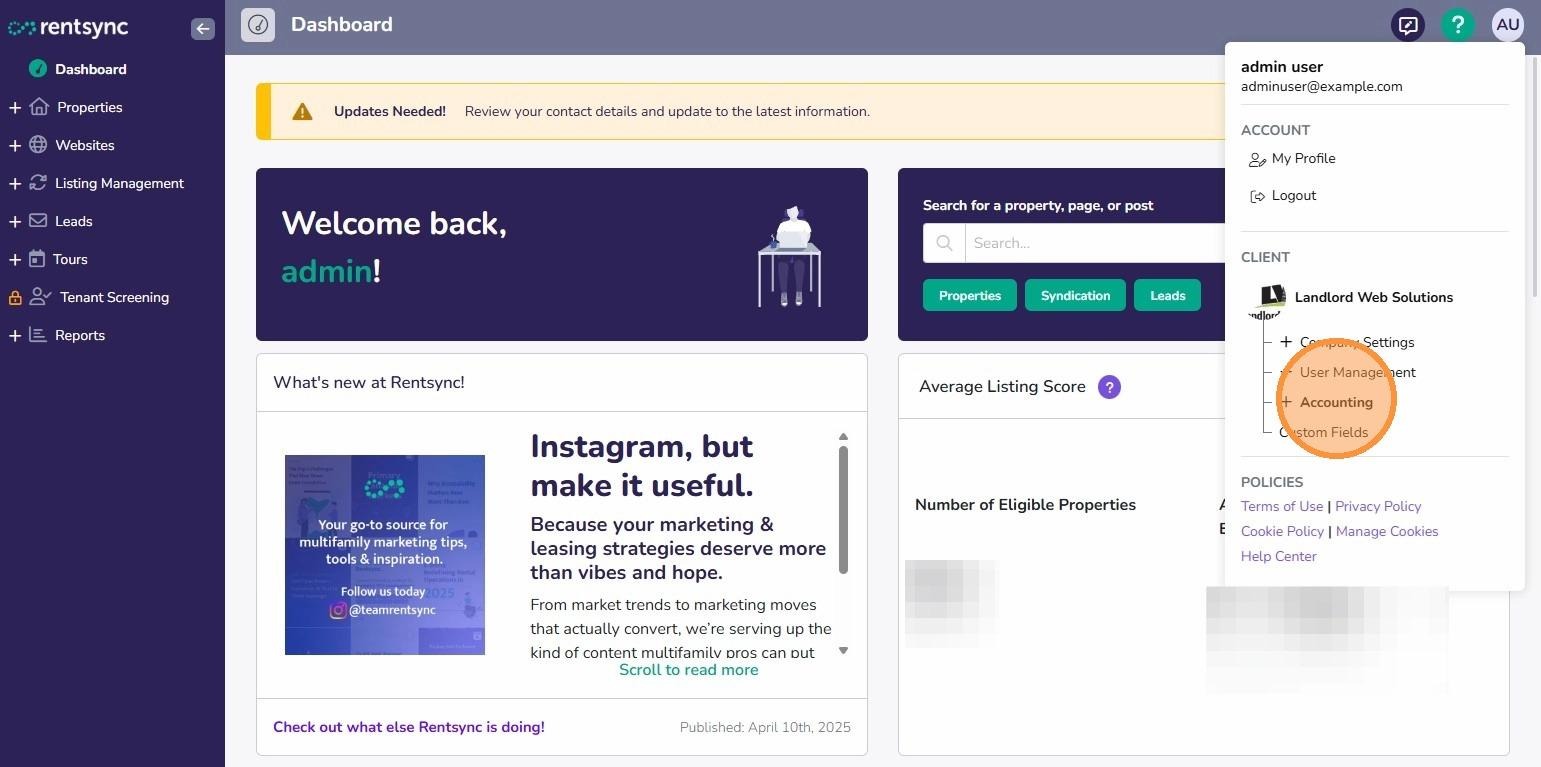
Click Accounting
-
-
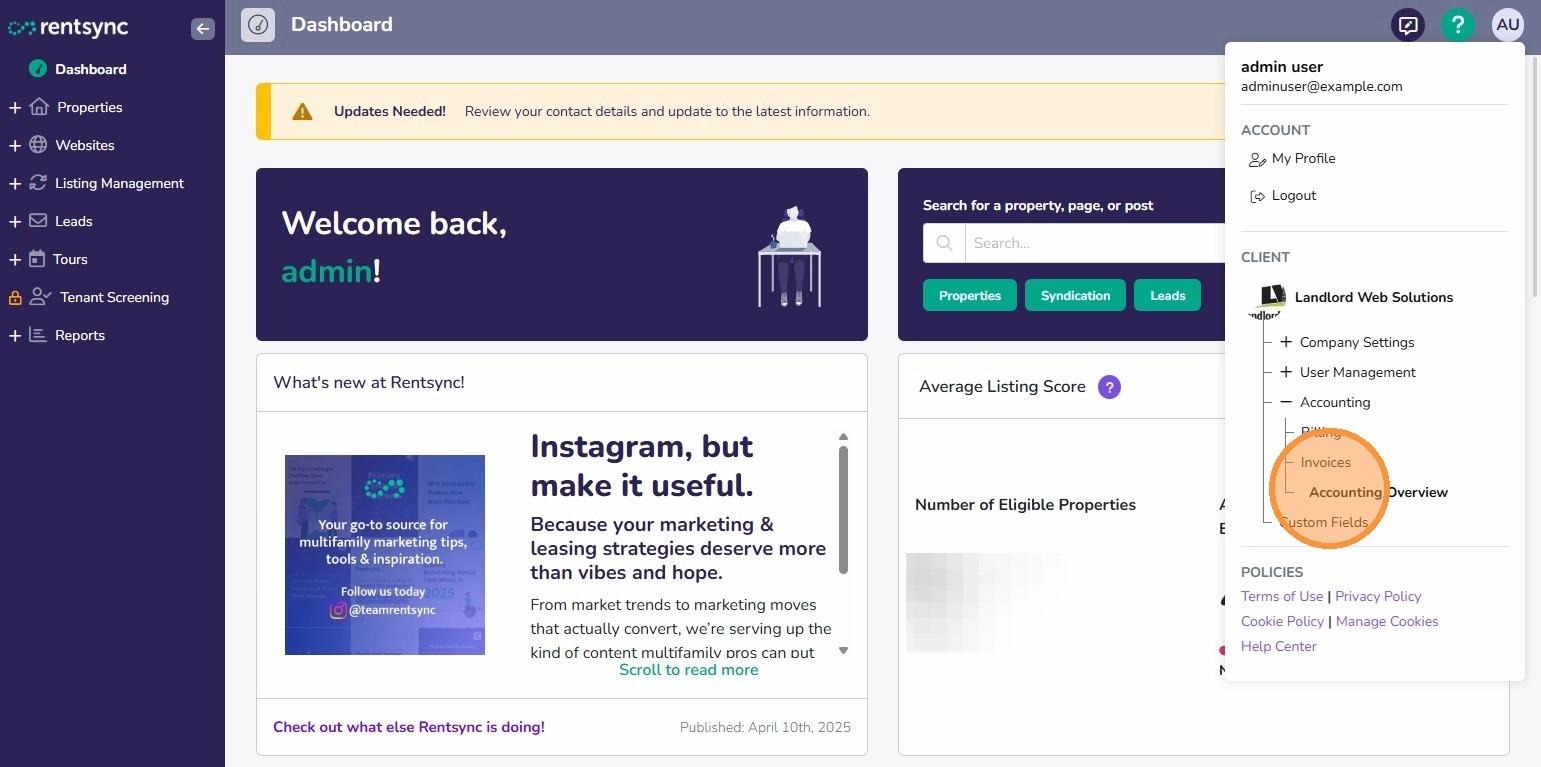
Click Accounting Overview
-
-
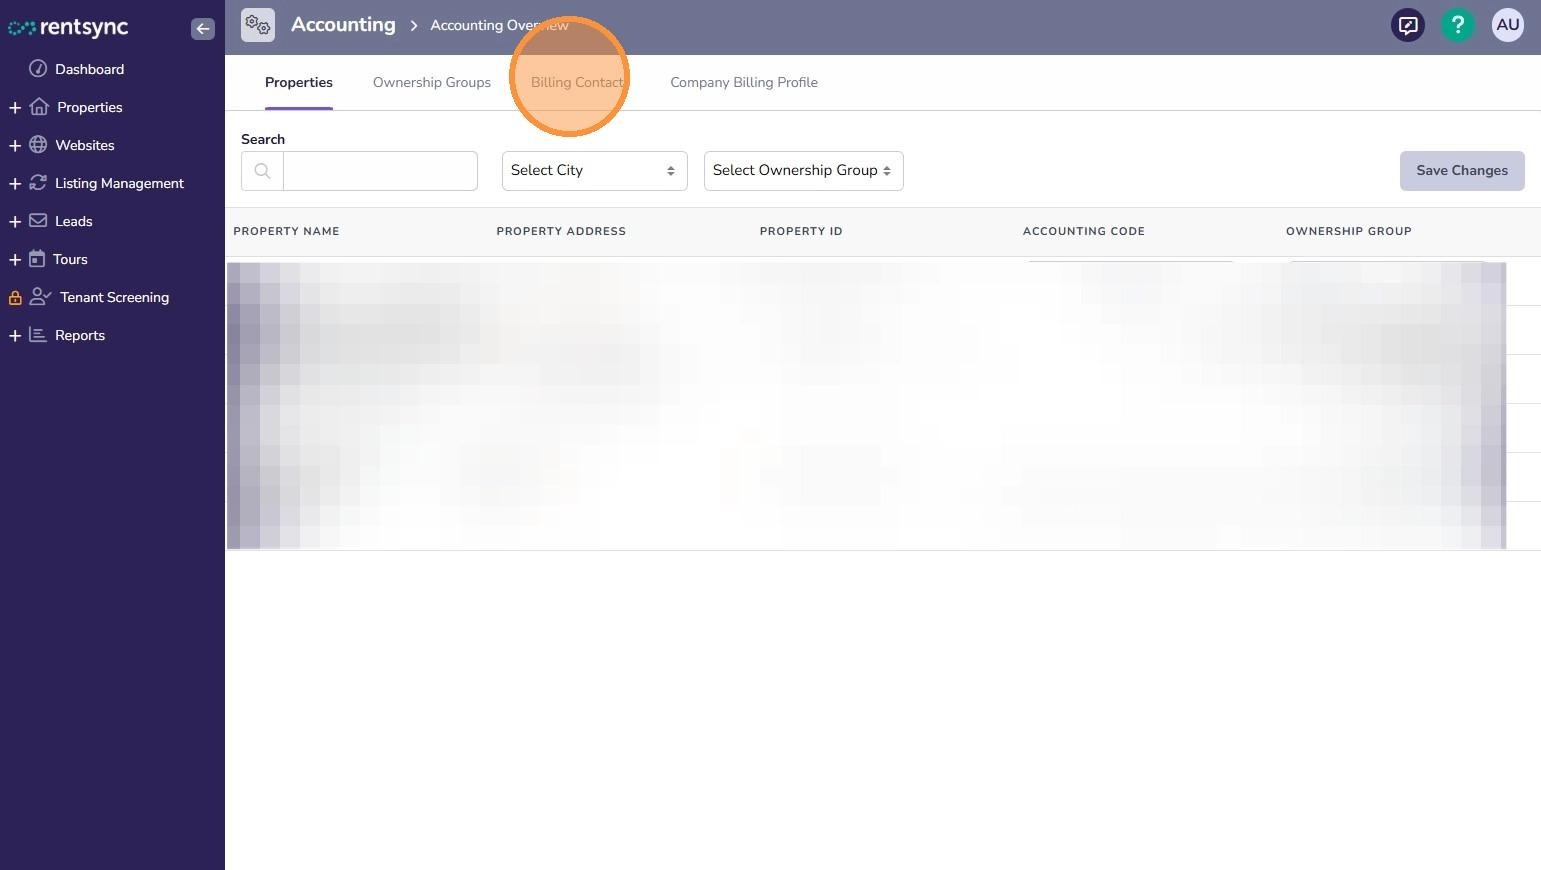
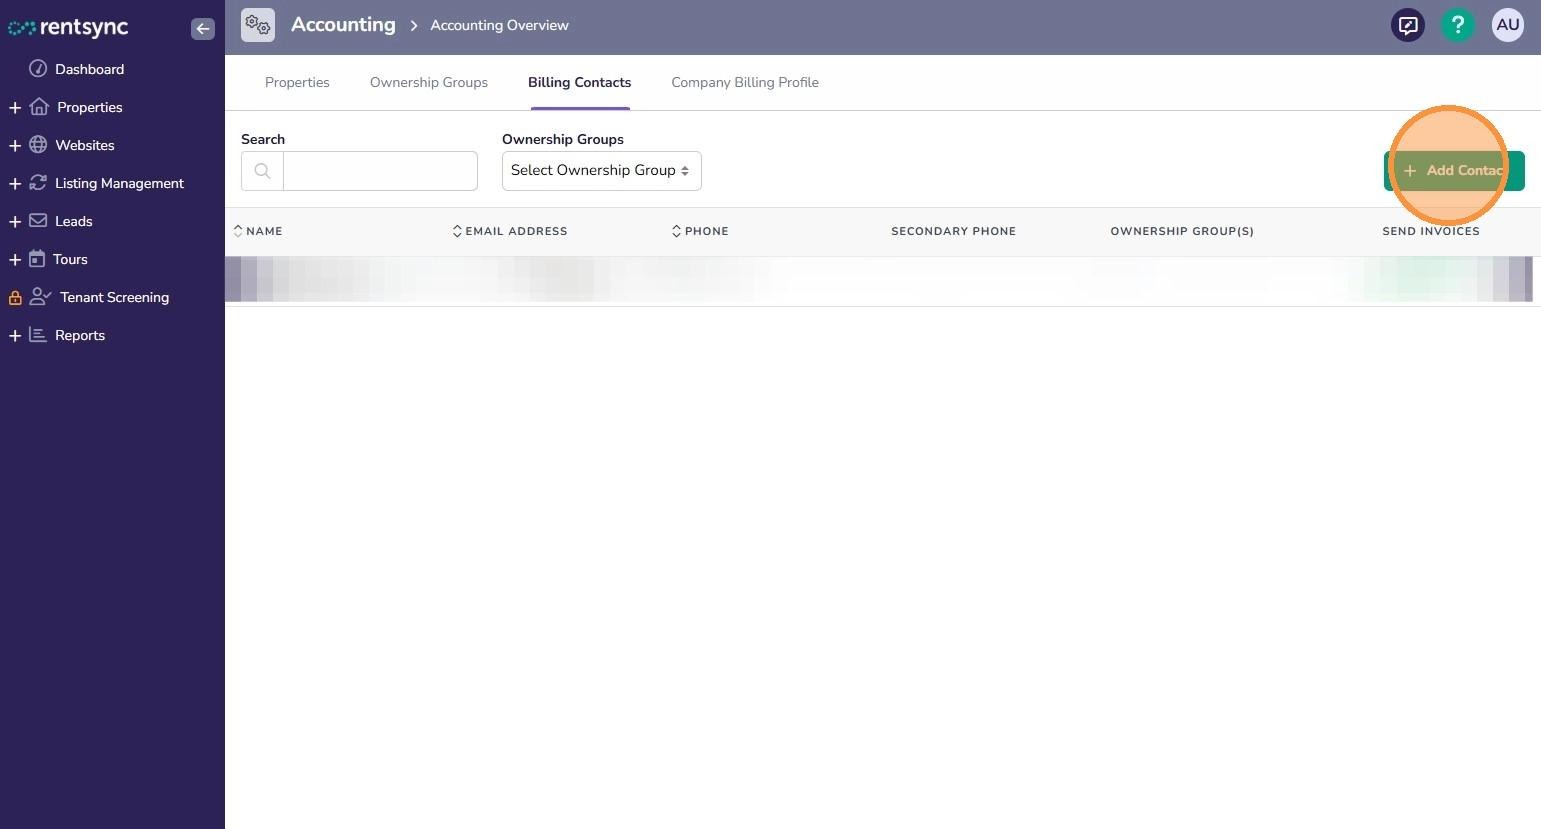
Click Billing Contacts
-
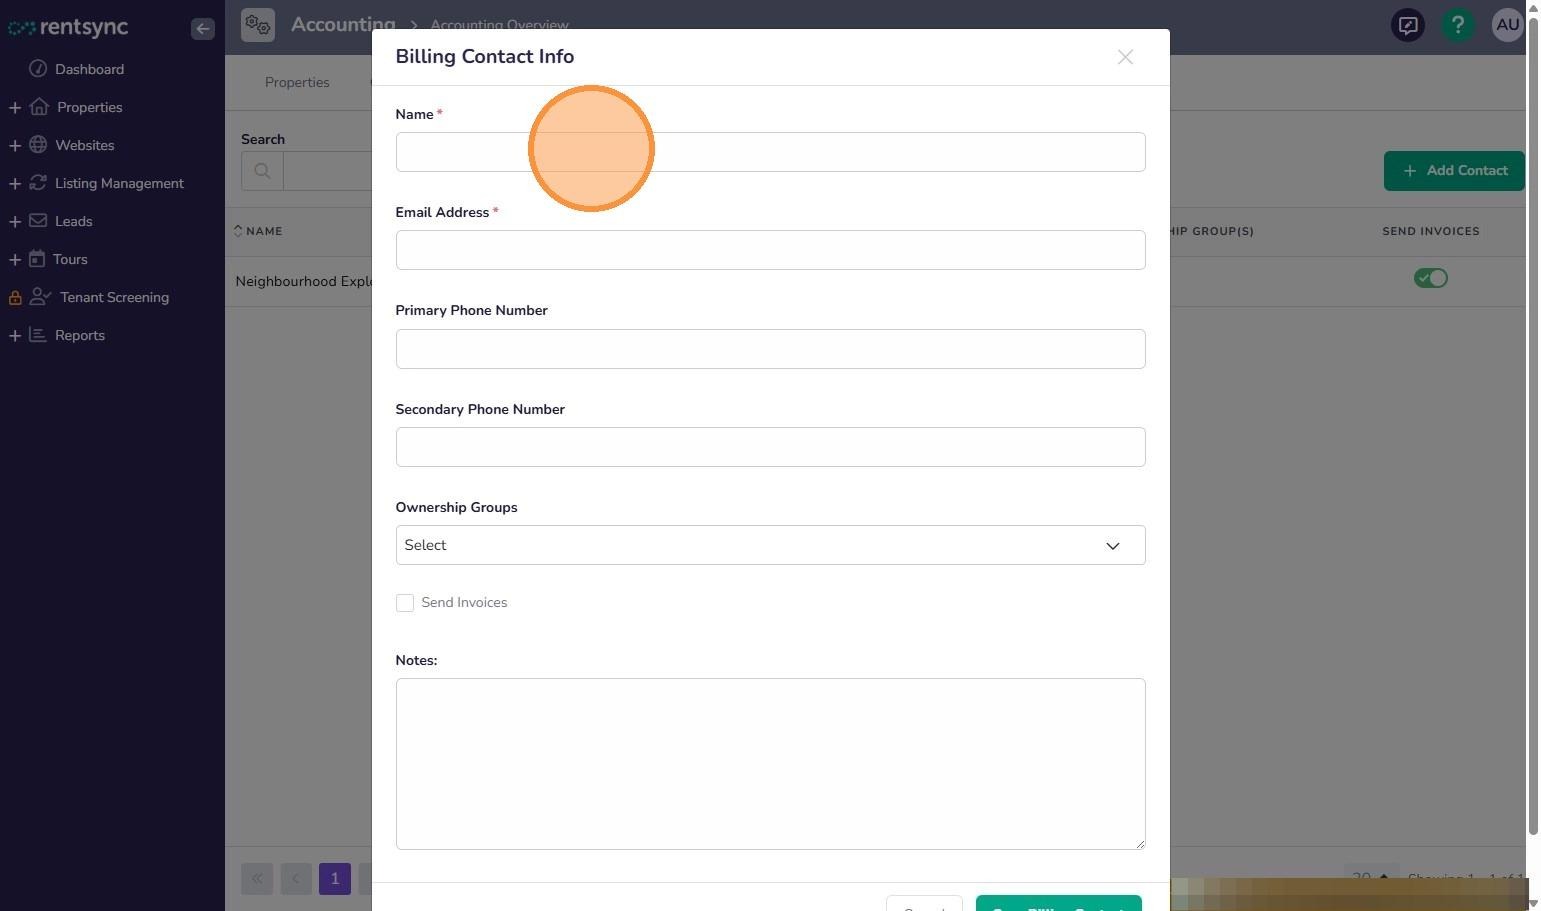
- Click Add Contact
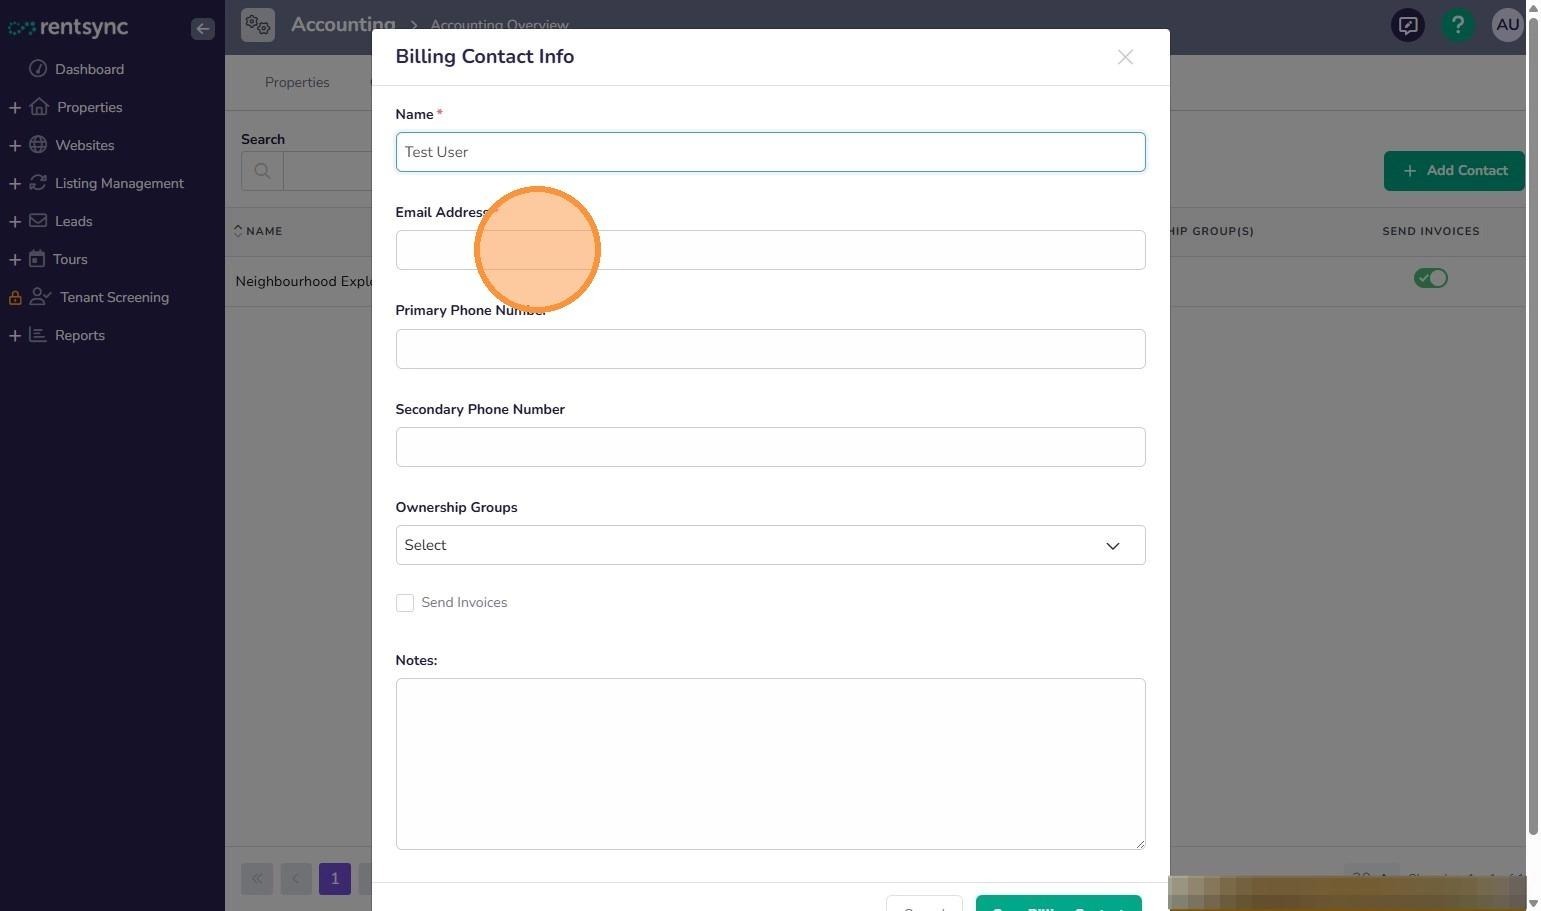
- Enter the contact’s name
- Enter the contact's email address.
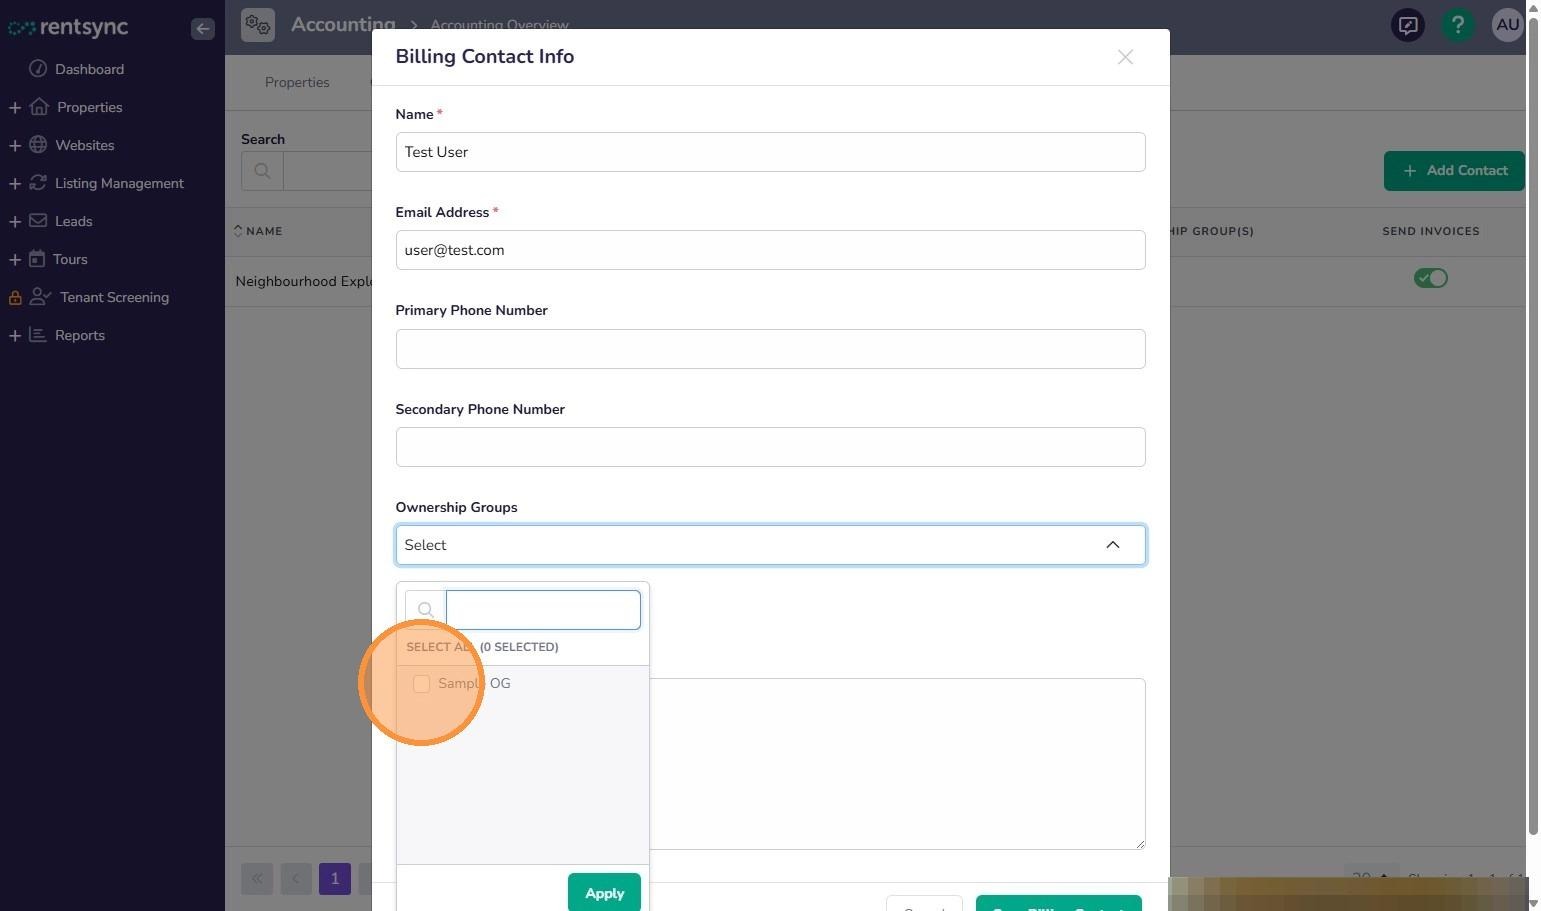
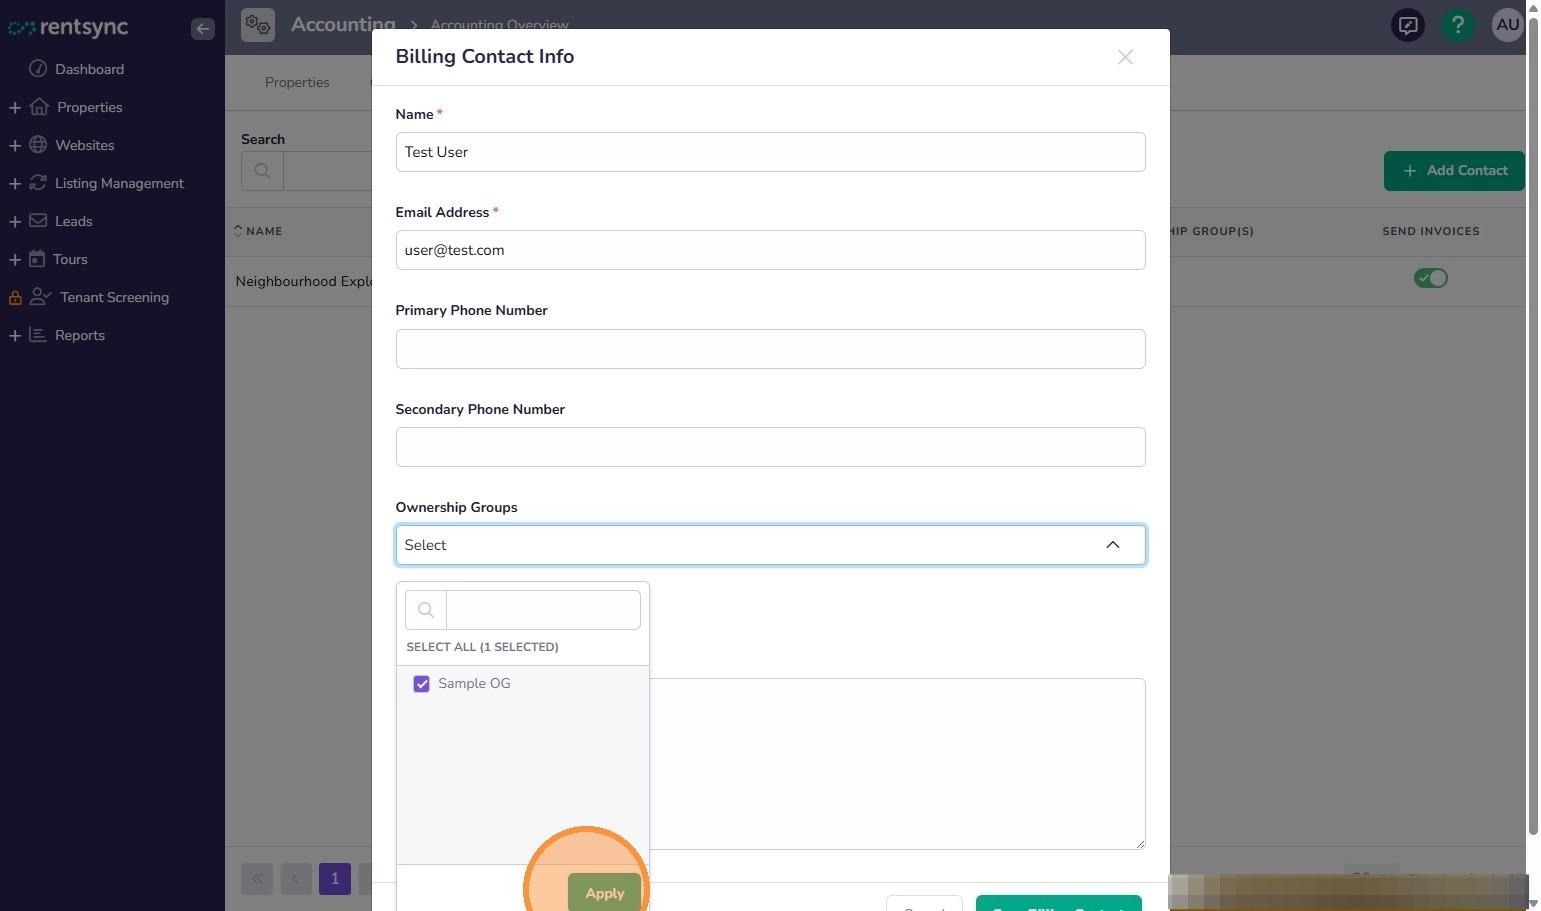
- If applicable, select the ownership group(s) this contact should receive invoices for.
- Click Apply
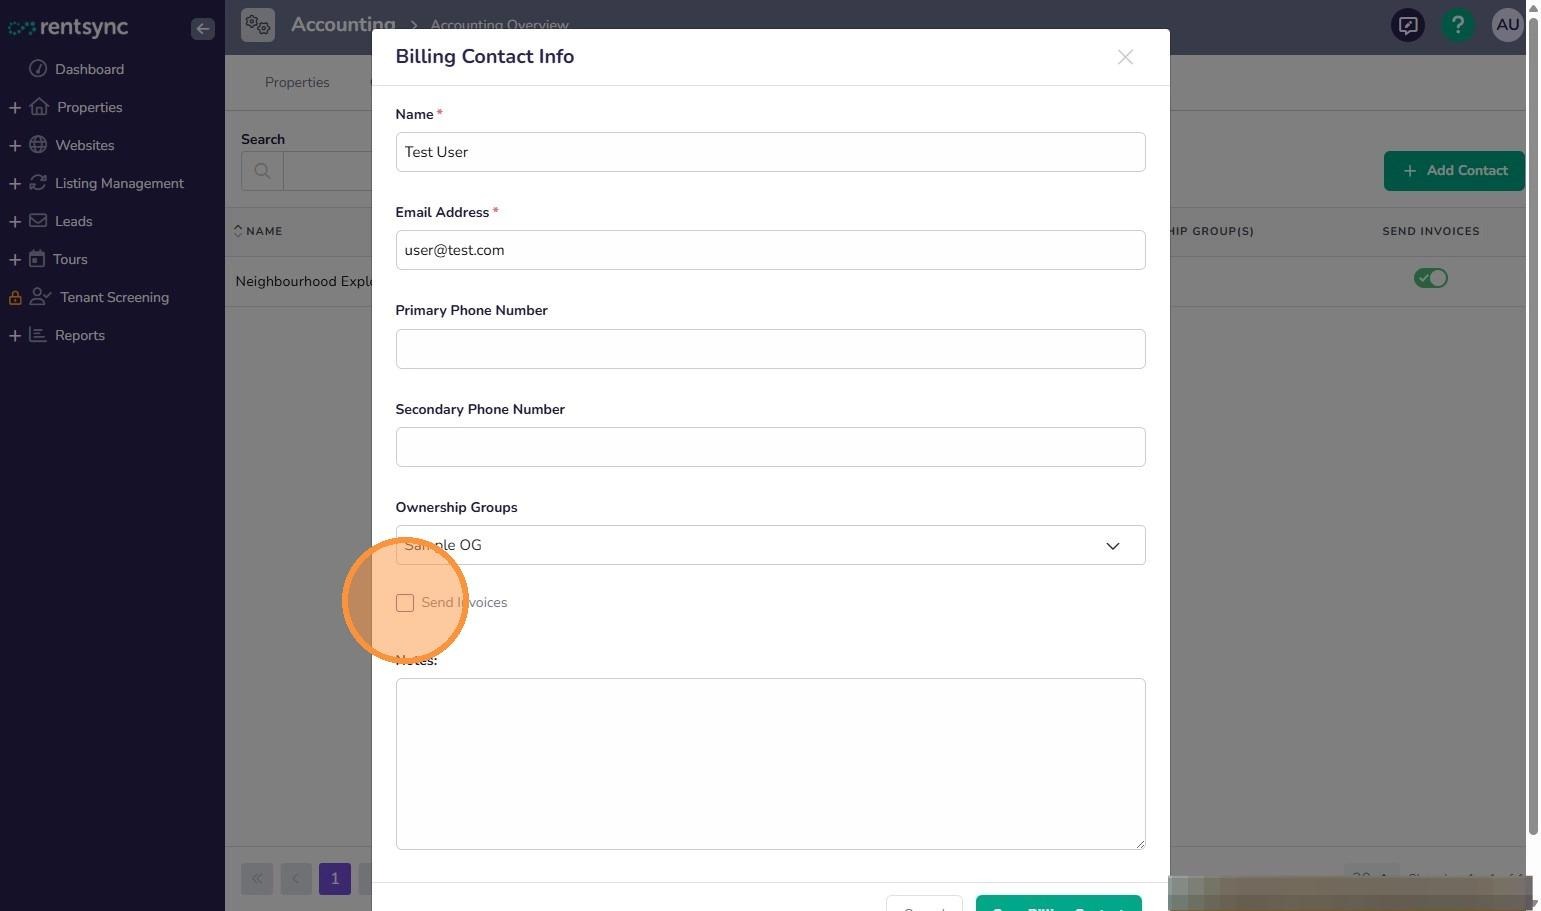
- Check the box labelled Send Invoices
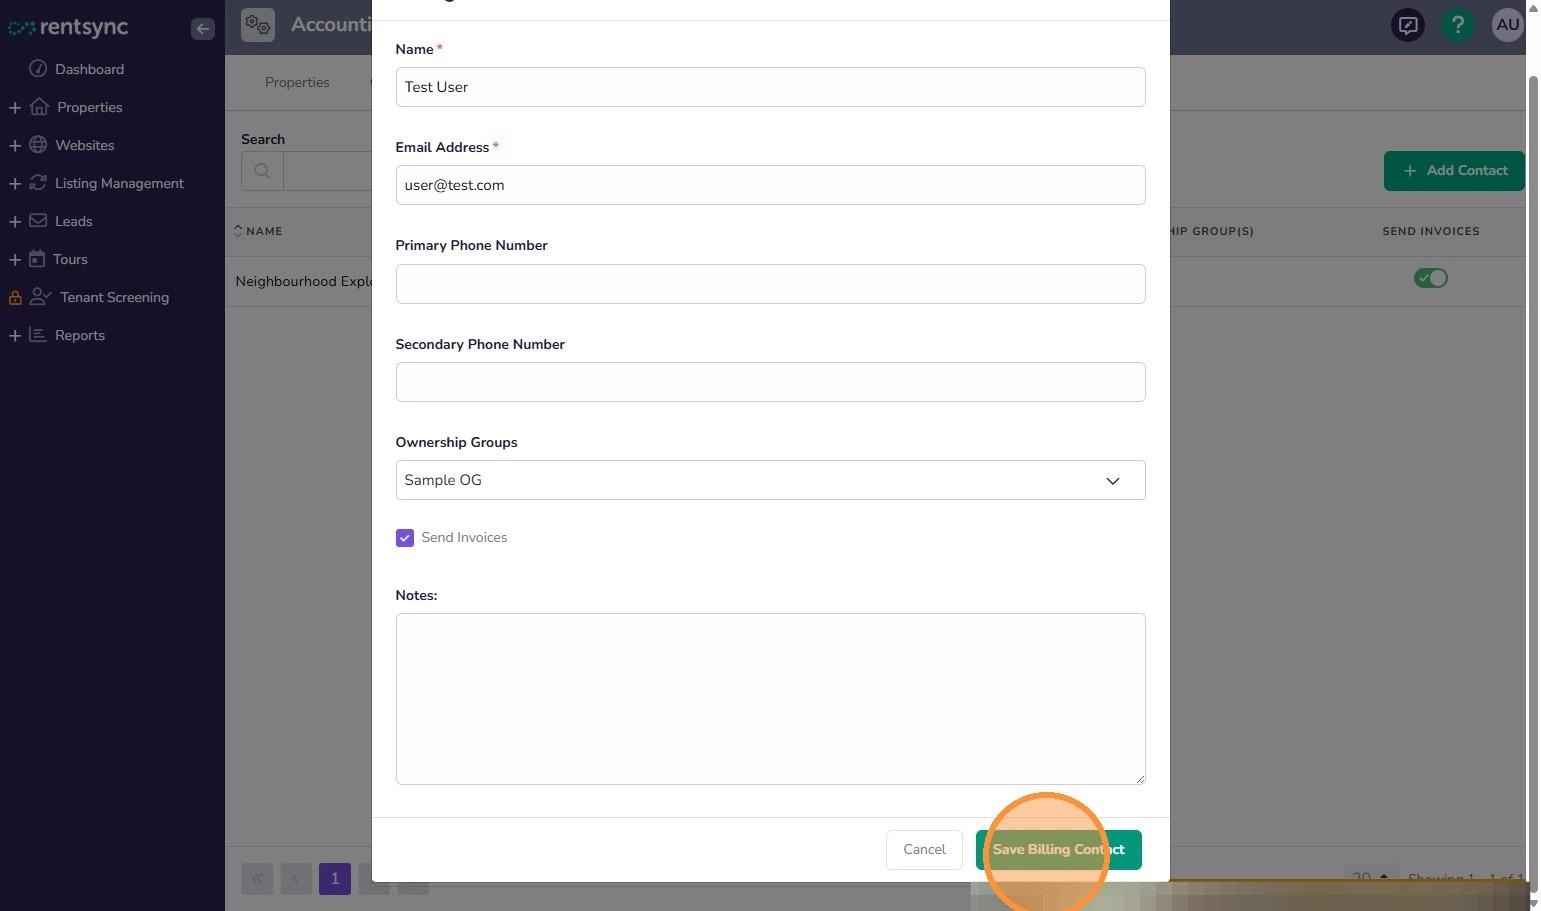
- Click Save Billing Contact
Note: If no ownership group is selected for a contact, that contact will only receive invoices for charges that aren't assigned to any ownership group. They will not automatically receive invoices for every ownership group on the account. If you want one contact to receive all invoices across every ownership group, add that contact twice: once with no ownership group selected, and once assigned to each ownership group they should also receive individually.
Tip: You can add more than one billing contact. This is useful if different people need to receive invoices for different ownership groups, or if multiple people need a copy of the same invoice.
Enabling and Disabling Invoice Recipient
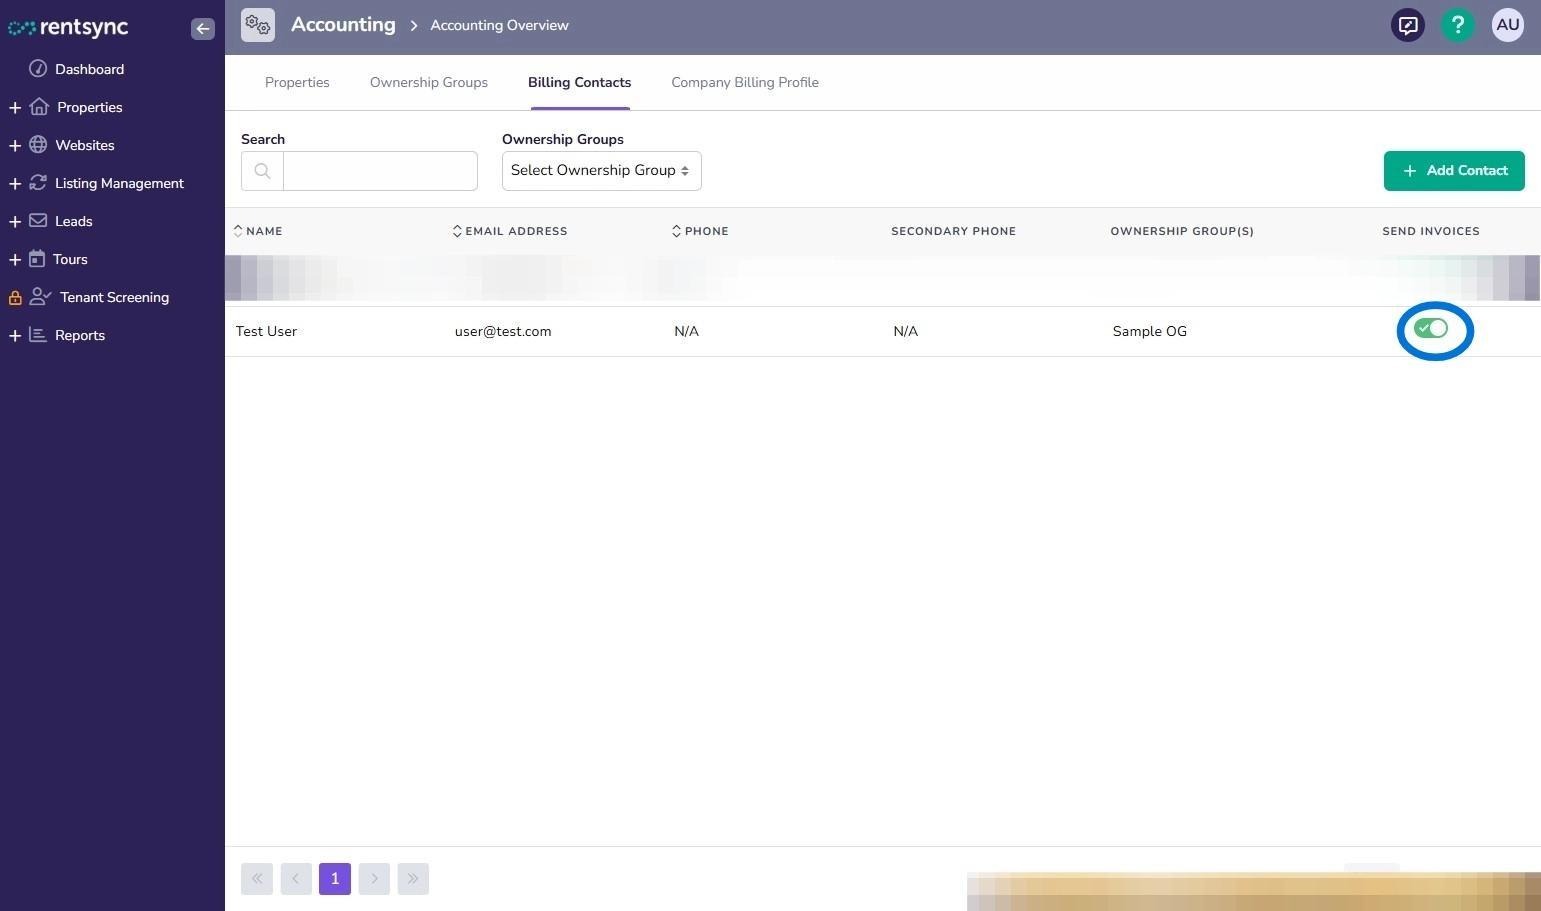
To stop a contact from receiving invoices without deleting them, toggle the Send Invoices switch off. You can turn it back on later.
If you need further help paying your Rentsync invoices online, contact billing@rentsync.com